Once you get the body shape, wheel lightening, and weight distribution right, the next step to building the fastest Pinewood Derby car is modifying the axles. Removing crimp marks and polishing each nail axle is normally allowed in any race. However, there is one aspect left that is among the most controversial in races everywhere – placing groves in the axles. You can check for Pinewood Derby Car Grooved Axles in 2023.
Grooved axles on a Pinewood Derby car are created by placing the axle nail in a fixed drill or drill press and using a file to cut a channel into the shaft where the inner wheel hub touches. The purpose of grooving axles is to reduce the amount of axle surface the wheels contacts.
This reduces surface contact of plastic to steel with each wheel rotation, which helps increase speed.
The concept and mechanics of grooving axles is simple enough – but experts are divided on if it is worth doing. Let’s see why this is…
To Groove
With a drill press and moderate selection of files and sanding cloth or sandpaper, putting a shallow channel in an axle takes anywhere from five to fifteen minutes for most people. That’s great, but why groove your axles in the first place?
Most people choose to add channels or grooves to their axles to minimize the amount of the inner wheel bore surface that comes into contact with the steel of the axle shaft. You will see how some people say it reduces friction because the contact area is reduced and then others say that the friction is the same because eth weight (force) is the same but distributed over a smaller surface area.
The truth is, you should bore your wheel hubs to the maximum allowable amount (resulting diameter) and make it as smooth as possible. A further truth is that derby wheel plastic is semi-soft and prone to gouging if something hard and sharp enough rubs against the inner hub under stress. With all other things being equal, having a groove in place greatly reduces the possibility of the inner hub walls grinding into anything hard stuck between the axle and wheel (grit, sand, a metal shaving, etc.)
Just remember that it is important to ensure the groove is contained within the hub. The inner wheel hub needs to make constant contact with at least part of the full thickness of the nail axle at each side or it can tilt cause problems.
Another reason some racers reportedly add grooves is to have a place for extra graphite lubricant to reside. The thought being that it will fall out and continually lubricate the axles as the race goes on. This logic may or may not be sound and using the channels this way may or may not be a good thing. I advise you simply add graphite until the wheels spin freely for at least 20 seconds after you give them a good spin with your finger.
Or Not to Groove
Some people invest a lot of time and energy building computer models to determine if placing grooves in axles is a good idea. The thing is – computer algorithms do not always reflect reality. There are a lot of other considerations such as if you use bent axles, canted (from drill angle into the car body), and even how your wheels are prepped.
Based on the outcome of many races, I always groove my axles if the race allows it. So, form my preceptive at least, the only time to not groove the axles is when the race rules prohibit it. But again, it comes down to personal preference.
Why Would Adding Grooves Be Against the Rules?
While removing blemishes and polishing axles is allowed in every derby I know of, adding grooves is not. This is because removing mass form the axle is considered a major modification.
Sometimes it is merely a technicality. Official BSA Pinewood Derby axles come stock with a diameter of 0.088” with a tolerance of 0.01” up or down. To keep the race “stock” the race rules might state that the axle must fall between 0.087” and 0.089”. This is just to keep the playing field even.
Get into the Groove
There are different styles of grooving used by different racers. Each person will use the style they like best and each style can vary by how they setup their car – and even how they lube the axles at race time.
Here are the specs I like to use:
- Leave a 1/16″ gap between the flat inner side of the axle hub (nail head) and where your groove will start.
- Cut a shallow groove 3/16″ high at the depth you wish (a shallow channel is all you need). Use a 3/16” fine metal file if possible.
- The farthest point of the grooves should be 1/4″ above the inside of the nail head.
How to Groove Pinewood Derby Axles in 2023
If you can get access to the following tools, it will make life a lot easier and speed up the grooving process while improving accuracy.
- Drill press or power drill clamped into a vice
- 3/16” fine grade metal file
- A 1/16” spacing gauge (or a nickel or toothpick)
- Safety equipment, including safety goggles
Axle Grooving Steps:
- Put on your safety equipment, such as eye protection.
- Mark your axle with where the groove will be or setup your spacer guide (instructions below).
- Begin by placing your axle nail about one-third to one-half of the way into the drill chuck.
- Next place your 1/16” spacer or nickel on the inner flat of the nail head and mark the spot with a pencil or fine tip marker.
- Now shade in the space between the mark and head of the axle with a marker. When filing you want the bottom of your file at the top of this line. Feel free to jump ahead to the “toothpick hack)!
Hack: You can also get a regular toothpick, which is just over 1/16” in diameter, and either glue it as is or flatten it to 1/16” thick in a vise. Now glue the toothpick to the bottom edge of your file (back from the file face so it does not contact the nail).
This can ride on top of the polished axle head so you can rest the file and maintain perfect spacing on all axles easily.
Pro Tip: Depending on file and toothpick length, you can tape or use wire-ties to reinforce the toothpick to file connection by wrapping it on either side of where the file will contact the axle.
6. Start the drill running at medium speed and set the file gently against the axle shaft.
7. Increase the drill speed and pressure exerted on the file until you get the depth you want. I also slowly glide the file back and forth to eliminate wear-spots on the file texture. Use droplets of water as a lubricant and cooling agent if needed.
That’s all there is to it!
You can also check this youtube video below-
Bonus Tips:
Use a medium file to start and a fine file to finish if you want to do the job quickly while maintaining a good consistency. If you are buying files for this purpose, just get the finest available. It will take a bit longer to get the grooves in place, but they will be in a nearly finished state when done.
A 3/16” flat file is a good choice for this. It is a standard size for “needle files” you might find at a hobby shop and for chainsaw sharpeners at a hardware store. Please note that if possible, you want to work with a flat face file – not round.
Flat face files are available in rectangular or triangular profiles. The two side (rectangular) flat files will usually have a different finishing grade, or grit, on each side. The triangular type usually has three different grades from course, to medium, to fine.
Pro Tip: If you want to closely approximate 1/16” you can use a US nickel or toothpick. Nickels are just a hair over 1/16” thick and accurate enough for what we’re doing. Just don’t use the nickel as a spacer when the drill is turning. One slip and that five-cent piece can become a bullet-like projectile!
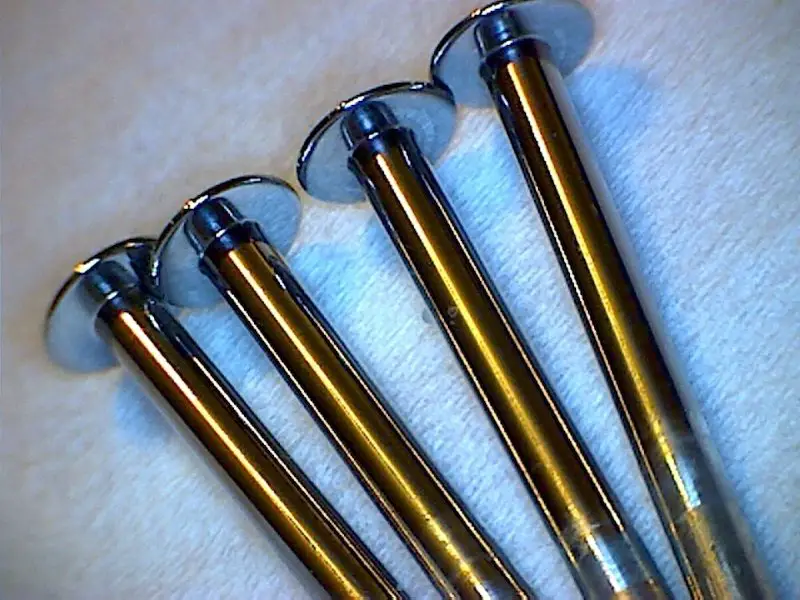
As you can see above, the groove does not need to be deep. Also note that it might deepen a touch more upon the final sanding and polish if you choose to do this after adding the groove. There is another post on this site that walks you through the perfect polishing process in about five minutes.
Pro Tip: If you perform your initial filing, sanding, and polishing before you cut in the groove it helps eliminate the risk of the file slipping on a blemish on the nail. Once the channel is cut, you can smooth it as much as you like, but it does not need the same mirror-finish as the thicker parts of the axle because no portion of the wheel should ever come into contact with it.
In Closing
Don’t forget to polish your axles, which is even more important than adding grooves! Again, here is a link to an article on this site that will help you polish your Pinewood Derby axles like a pro!
I hope you like reading on Pinewood Derby Car Grooved Axles in 2023.
Last update on 2023-10-26 / Affiliate links / Images from Amazon Product Advertising API