Most race rules will allow you to “remove stamp marks and imperfections” from the axles provided in the kit. These are the little raised bumps and protrusions from when the nail was cast. This is best done with a file. Most Derbies will also allow you to polish the axles to varying degrees. This is important because polishing your Pinewood Derby axles is one of the fastest and simplest ways to make your car go faster.
Polishing Pinewood Derby axles can be done most efficiently with a drill, a vice, 400, 600 and 800 grit sandpaper, and a rubbing compound. Place the drill in a vice or use a drill press. Put the axle nail one-half inch into the drill chuck so one-half inch of the axle is showing, including the nail head.
Start at a medium-low speed and 400 grit sandpaper. Increase speed to comfortable level as you increase grit to 600 then 800. It is best to trim your sandpaper to ½” or narrower strips for ease of use. Apply a bit of water to the 800 grit sandpaper. Finish with a small dab of rubbing compound on a strip of cloth. Your axle is polished when you can see and feel no imperfections.
You can find the official BSA Pinewood Derby Rules here. Just keep in mind that many races have variations to the rules.
Now that we have a general idea, let’s get into the details with illustrations. It makes a lot more sense this way.
Pinewood derby Axle Polishing step by step in 2023
We will start by looking at why axles should be polished.
The Axle nails are mass produces using a stamping process. This leaves small protrusions such as crimp marks on the shaft and imperfections on the inside of the nail head. At best, they can increase friction and slow your car (NOT a good thing). At worst, these little things will make your car bounce and gouge into the wheels acting like a set of poorly installed brakes.
All that being said, at the very least you should remove the crimp or stamp marks on the body and burs at the head. Here is what they look like. Please note the close-ups are not exaggerated.
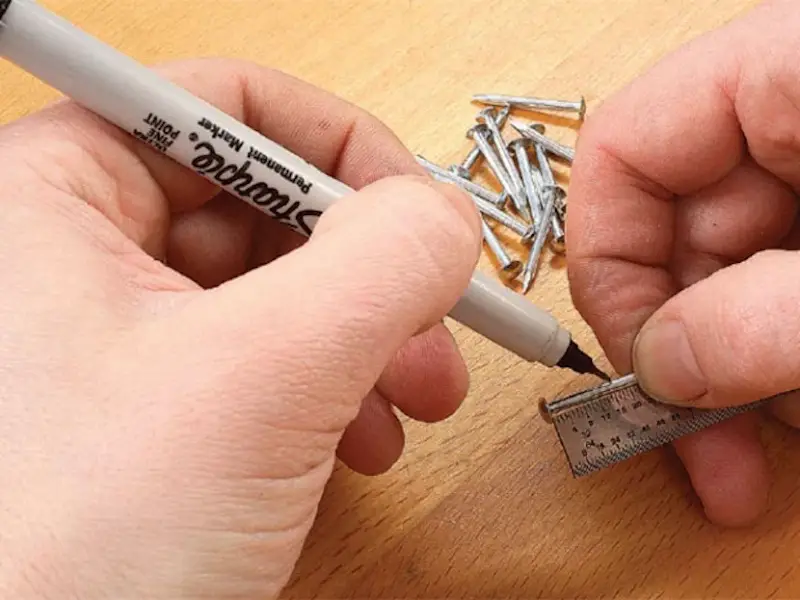
Pro Tip: Before you polish the axles take a Sharpie and mark the outside of the nail head at the edge closest to the crimp marks. Position these marks straight up when you insert the axles so you don’t risk the inner wheel hub touching where the marks were – just in case you did not get all of it off.
How to Remove Stamp, Crimp and Bur Marks from Axles
It is easiest to file these down these imperfections with a fine-grade steel file by placing the nail (point first) into a drill chuck and rotating it at low speed. Then press the file gently against the nail shaft and let the bumps get shaved down until smooth. Be sure to always keep the file perfectly aligned perpendicular to the nail shaft. If you tip the file up or down it can gouge the axle.
If you have access to a drill press, consider using it. If not, clamp the drill carefully and securely in a bench vice. This works better that trying to hold the drill by hand.
Here are some tips to make it easier…
- Wear safety gear including safety goggles! These nails are coated, and flecks may fly off when trimming down any protrusions.
- Insert the nail about 3/8” to ½” into the chuck and secure it.
- Start the RPMs at a low setting and make sure the nail is “true,” meaning straight up and down. If you see a wobble, stop the drill, and adjust the nail in the chuck until it is perfectly vertical.
- Speed up the RPMs to medium-low and lightly apply the file to the side of the nail as straight up and down as you can get it. Using a light touch, this is not difficult.
- Slide the file up and down the length of the nail shaft slowly to get an even grind.
- Remove the file and stop the drill after a few minutes to see if the stamp marks have been filed down.
- Resume filing and speed or slow the drill as you think best. Take your time. The amount of material that gets taken off will depend on three factors” Speed of the nail turning, cutting grade of the file, and pressure applied to the file against the nail.
- Finish by turning the file downward so you can remove the bits between the nail head and shaft.
How to Polish Axles in 2023
Use the same arrangement that we did for filing the imperfections away. This time however you will use narrow strips of fine grit sandpaper to smooth the axles all around. One-half-inch strips of metal-grade sandpaper work well. This is typically called “sand cloth” and can be found in the pluming section of the hardware store – where copper tubing and soldering supplies are found.
Start with 400 grit. Then move on to 600 grit. Eventually get to 800 or 1,000 grit with a bit of water on the sand cloth. Here is the process broken out into steps:
- As always – Wear safety gear including protective goggles.
- Place the nail 3/8” +/- into the chuck and tighten it.
- Just like when filing the axle, begin with low RPMs and make sure the nail is “true,” – as perfectly vertical as you can get it. As before, if you notice a wobble, stop the drill, and adjust the nail until it is true.
- Place the 400 grit sand cloth around the back of the axle, so the grit side touches the axle, and pull gently the paper toward yourself with both hands.
- Increase the RPMs as feels comfortable and that you are making good progress without taking away too much material.
- Slide the sand cloth up and down the length of the axle slowly as it rotates.
- Continue to swap to finer grit paper and add droplets of water as needed when you get to 800 grit or above.
Pro Tip: When you get to 600 or above you will likely be dealing with a charcoal gray sand cloth made for preparing metal surfaces such as copper and brass. These typically come in rolls that are ¼” to ½” wide. It will look something like the image below. Using 1/4″ provides more detail in small areas such as axle nail heads.
Adding the Final Touch of Axle Polish
You can finish polishing the axle by applying a “rubbing compound” on a cloth to maximize smoothness. If you have sand cloth rather than sandpaper, the tightly woven backing can serve as the cloth for the rubbing compound. The image below shows the cloth side doing the buffing. You simply flip it after using the other side that contains the grit and ad a dab of rubbing compound.
The nail is an inch long and you are only polishing a bit over ½” from the head down the shaft (about 5/8”). The rest will be pushed into the axle hole. You want this to be a bit course – at least where the point taper begins – for a better bite into the wood.
Pro Tip: If Allowed, Taper or Bevel the Inside Axle Heads
How to Bevel the Axle Head in 2023
Beveling or tapering is sometimes considered a major axle modification so make sure it is allowed before doing it.
The idea of tapering is simple. When smoothing the flat portion of the axle nail head with the file, angle the file down and away at a slight angle. It will reduce the amount of friction your outer wheel hub will encounter against the face of the axle head during the race.
I find that a 10-degree bevel or taper works well but do not worry too much about the angle’s precision. If you hold the file at the same angle it will all be even. The first trick is get it to a bevel that works well and lets the wheels spin easily while retaining enough of the axle nail head to meet requirements. The second trick is to repeat this as closely as possible three more times. Some people build jigs using a protractor and level, but I find doing by sight and feel work well for me.
That wraps up how to deburr and polish pinewood derby axles. Now for a couple bonus tips to put you ahead of the competition!
How to Improve Your Axle Placement in 2023?
If you want to get the most out of your car’s performance, find out if you are required to use the pre-cut axle slots in the car.
These are often not cut at 90 degrees square so wheel alignment will be difficult. When you buy your kit be sure to check to see if the groove is cut at a true right angle. If it is not, politely ask the salesperson if you can swap kits.
Pro Tip: If You Do Not Need to Use the Provided Slots, Flip the Block Over and Drill in Pilot Holes for Axle Nails.
Re–drilling Axle Holes
Whether you are correcting a poor factory axle placement or drilling into fresh wood, use a 2.2 mm drill bit to place pilot holes where your wheel axles will go. This is the perfect size. Drill bits can also be found in 2 mm and 2.1 mm; however, they require too much force when pushing in the axles. Pressing too hard or using even a tiny upholsterer’s hammer can split the brittle pine block so close to the bottom edge. You want to be able to press the axel in with your thumb or a flat edged tool.
If you have a drill press to get a perfect 90-degree angle that is best. If not, consider using an axle guide or jig. There are several different types ranging in cost from $10 to $15 – including the correct drill bit. Just run a search online and you will get lots of options.
In Closing
This concludes how to best polish Pinewood Derby axles to prep your car for maximum speed. You can also check youtube video below on how to polish pinewood derby axles.
I hope you like reading on How to Polish Pinewood Derby Axles in 2023.
Last update on 2023-10-26 / Affiliate links / Images from Amazon Product Advertising API